1. Right click on the Solution, and click "Add New Project" -> Select "SQL Server Database Project"
2. Add a folder named "dbo" for table .sql files, and you can also add corresponding folders like "Scripts", "SeedData", or "StoreProcedures".
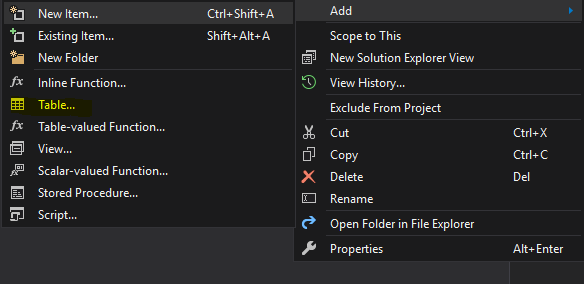
3. Add a table in the dbo folder
4. Design DB schema, you can either use interface to create the schema or use SQL to set it up.
5. Publish the database
When everything is set up as you desired, it's time to publish the database. In VS 2017, the publishing process can easily be done by some simple steps.
5-1 Right click on the DB project and click "Publish"
5-2 "Edit" database connection strings, and browse to your desired database server, here I use Local DB. Also, you need to give a specific database name for this db.
5-3 Once connection string is set up, it's time to publish the DB
5-4 Check if the DB is correctly set up
6. Visual Studio also lets you save your publish settings as a "publish.xml" file so you can Load your saved publish profile when you try to publish your DB next time.
That's it. Hope you get to know a bit more about how to set up a Database project in Visual Studio. If you have any questions, please feel free to leave a comment and I'll reply it as soon as I'm available.
Thanks,
CHW


GameStop is the best place to buy a 2nd Chance
ReplyDeleteThe third chance is that the game is the kind of place 우리카지노 where some people will always be in line against somebody. After 우리카지노 all, if I had a second chance at